

Like many creatives, I’ve often wondered just how far I can push my knowledge of the Adobe Creative Suite. My day-to-day will usually include using either Photoshop, Illustrator or InDesign, but as a designer I’ve always wanted to learn and understand much more. So when the time came to travel Asia in 2018, the gateway was opened for me to immerse myself in yet another of Adobe’s creativity software… Lightroom.
Now I’ll be the first to admit that when I first opened the programme back in June 2018, I was petrified. All the terminology, tabs, and layout was far different from anything I’d been used to before.
What was even more worrying was that I’d given myself four weeks to try and understand this programme before I was destined to hit the streets of Bangkok. But, understand is exactly what I did, and what a difference it made to my travel photography.
Like anything, if you want to be good at something then you need to practice. Practice really does make perfect, and although I’m far from perfect in Lightroom, I now feel comfortable enough and enjoy working with this extremely useful and powerful photo enhancing software.
Here are just a few of my Lightroom tips for enhancing your photography, and getting the absolute best out of your well earned shots:
- Presets: As talked about in my earlier blog, presets are a fantastic tool to instantly transform your photography, and give them your desired look and feel with the single click of a button. Although presets will save you huge amounts of time in the future, their creation will take time and effort beforehand. Creating presets really depends on your desired style and should ultimately be a reflection of YOU and your creative flare.
So what are presets?
Well a preset is a stored collection of custom settings (done in Lightroom) that can be applied to an image. Specific hues, vibrancies, tones and shadows are just a few settings that can be selected and stored. When it comes to editing an image, simply click on the preset (the settings on your editing panel will automatically adjust) and then decide whether to proceed or not. Using my travel photography as an example – my style was to give photography a moody/ softer feel in post production. By softening the blacks and limiting the saturation, I was able to create a uniformed look to my Instagram feed, which reflects my own personal taste and style. Once I’d created this range of presets (it’s worth noting that for my travels I created, and used a total of 15 specific travel related presets) I could then import my image, look at my feed, visualise the outcome, and click the preset that would closely achieve this. Of course there was always a few minor tweaks, but the bulk of the work had been done.
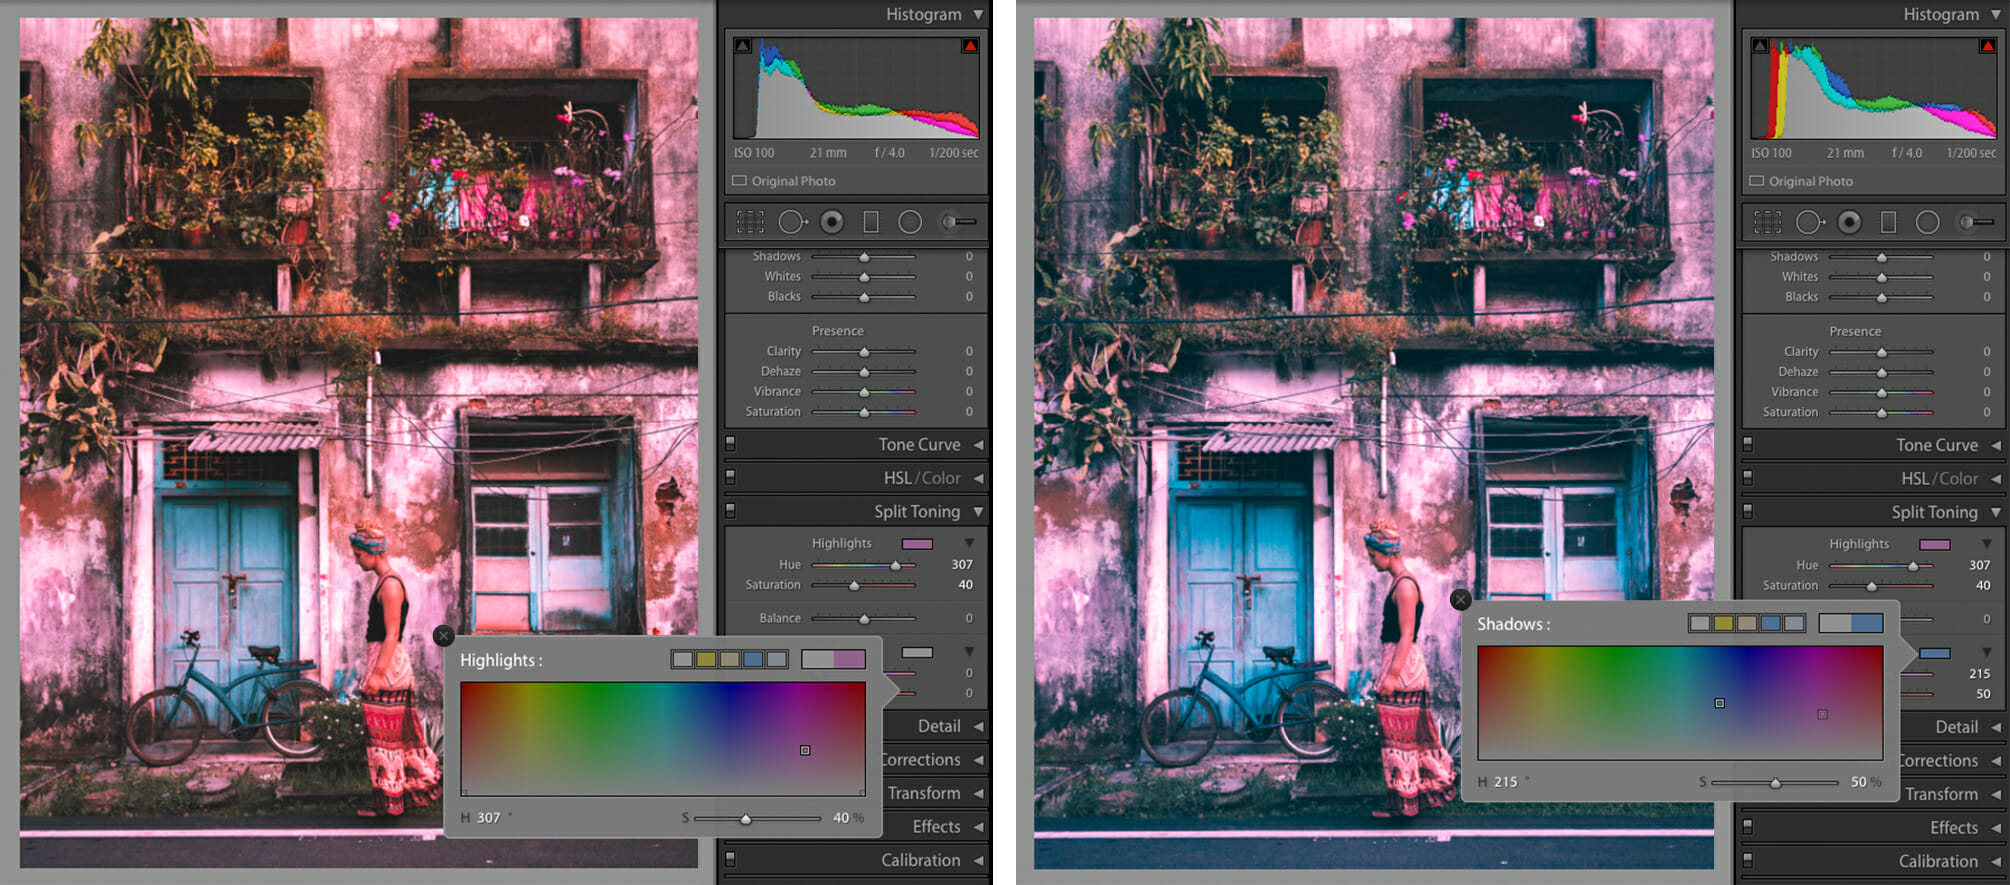
- Split Toning: A fantastic tool to alter the tones of your image is ‘Split Toning.’ Split Toning will allow you to add specific colour to your photos highlights and shadows. The more colour you want, the higher you set the value. To achieve the warmer tones in my photography, I would add subtle yellow tones to the highlights, and deep blues to the shadows. It really is a balancing act with this tool, as the image can look far too manipulated, but when used correctly, it can really help you in achieving that desired style.
Below is an example of how I used split toning to add a more ‘pinky’ tone to this beautifully characterful building in Southern India.
- Spot Removal: Before my travels, I’d researched hundreds of ‘Insta-famous’ landmarks to build the route of my travels. But the harsh reality was, a lot of these spots were’t quite as they appeared on screen. As humans, we’re responsible for the health and well-being of our planet, and unfortunately, this tends to be forgotten. Rubbish on streets and plastic washed up on beaches appeared far too many times. Now I’m not suggesting we should overlook these issues, but when you’re wanting to capture these spots and revisit those memories, Lightroom has the perfect tool available to remove those unwanted McDonalds cartons. It’s called ‘Spot Removal.’ Simply highlight the area to you want to erase, select a part of the image to replace that nuisance wrapper with, and BINGO… Job done.


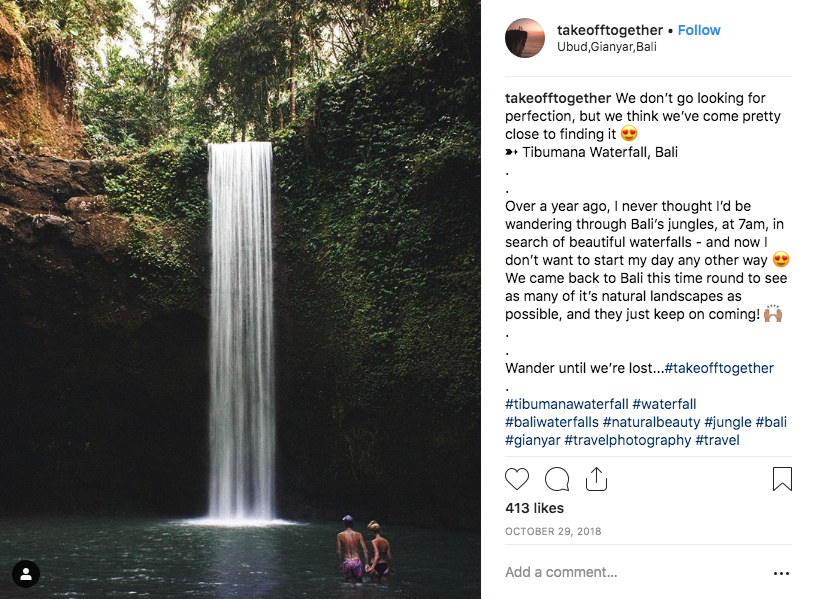
- Adjustment Brush: When it comes the enhancing certain areas of your image, the adjustment brush is perfect for this. Just like its name suggests, these tools allow you to manipulate specific areas of your image by targeting values such as highlights, shadows and overall colour. If you just want to make your sea pop with highlights, then the tool allows you to do just that. This brush is also a great tool to add/ enhance sunlight in your image. Below is an example of my specific values for adding a sun flare to your image. The area between the trees at Tibumana Waterfall in Bali could allow for light to pour through as shown in the example below. However, please note that when adding this artificial light, make sure the shadows and tones of your image allow this.

- Shadows and Blacks: My final tip is possibly the simplest but very useful, and that’s rather than altering the contrast of your overall image, target the shadows and blacks. By doing so gives much more control over your image when you want to add contrast and texture.


To see more of my photography tips, take a look at my earlier blog ‘Blog link’ and begin your journey to capturing awe-inspiring photography.
Travel Blog: www.takeofftogether.com
Instagram: @takeofftogether